By Marian Domingo, Contributor
When luring in customers with the aroma of cooking food is not an option, the next best thing is to tempt them with photos. Instagram is a great way to capture a whole new market, with millions of potential customers at your fingertips.
All you need is a good enough smartphone camera, some quick tips, good food, and you’re ready to go! We’ve come up with a guide to help you get started.
Always Look for Natural Light
Every photographer will tell you that lighting is everything. Natural light, in particular, can highlight your subject’s contours and angles in a way that a simple flash simply cannot replicate. When shooting food, stay by a window or find the best light source.
To ensure that you get enough light, try using a white cloth or board to bounce off the light from the window onto your food. Better yet, try scheduling your photos during what photographers call the “golden hours” — the last hour before sunset or the first hour after sunrise. As long as the weather agrees with you, these hours will give you near-perfect lighting.
On the flip side, harsh sunlight can wash out your food shots. So avoid staying under direct sunlight, and instead, choose an area with soft lighting.
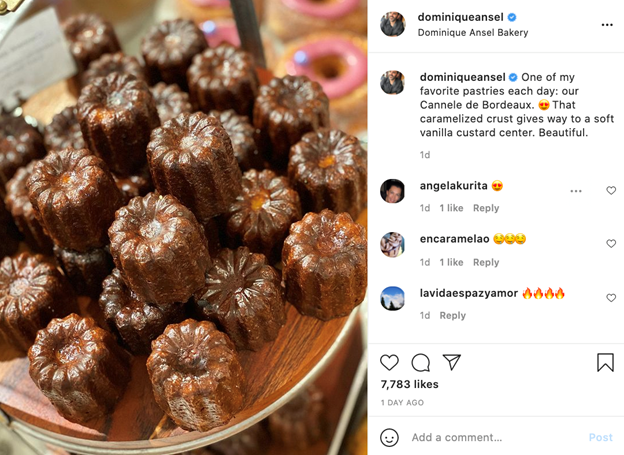
Dominique Ansel’s (@dominiqueansel) beautiful canelés glisten with the help of great lighting.
Pro tip: If shooting during daylight is not an option, ask a friend to help light up your shot with their flashlight or buy an inexpensive lighting kit (it’s worth the investment). This way, you better control the light’s intensity versus using your phone’s camera flash. Once done, use photo editing apps like Instasize to quickly adjust and improve the lighting of your shots.
Experiment with Different Angles & Perspectives
There’s no telling what angle works best for food. Sometimes, a flat lay or overhead shot might work to show off your entire spread, while some dishes deserve a close-up to emphasize its different layers and colors. It also helps to check the latest Instagram food trends for new ideas and review your Instagram feed for angle shots that you haven’t used before.
If your plate or tablecloth has interesting patterns, use these to complement your dish. Play around with other items like utensils, napkins, or salt and paper shakers. Sometimes, background elements are all you need to find the perfect shot.
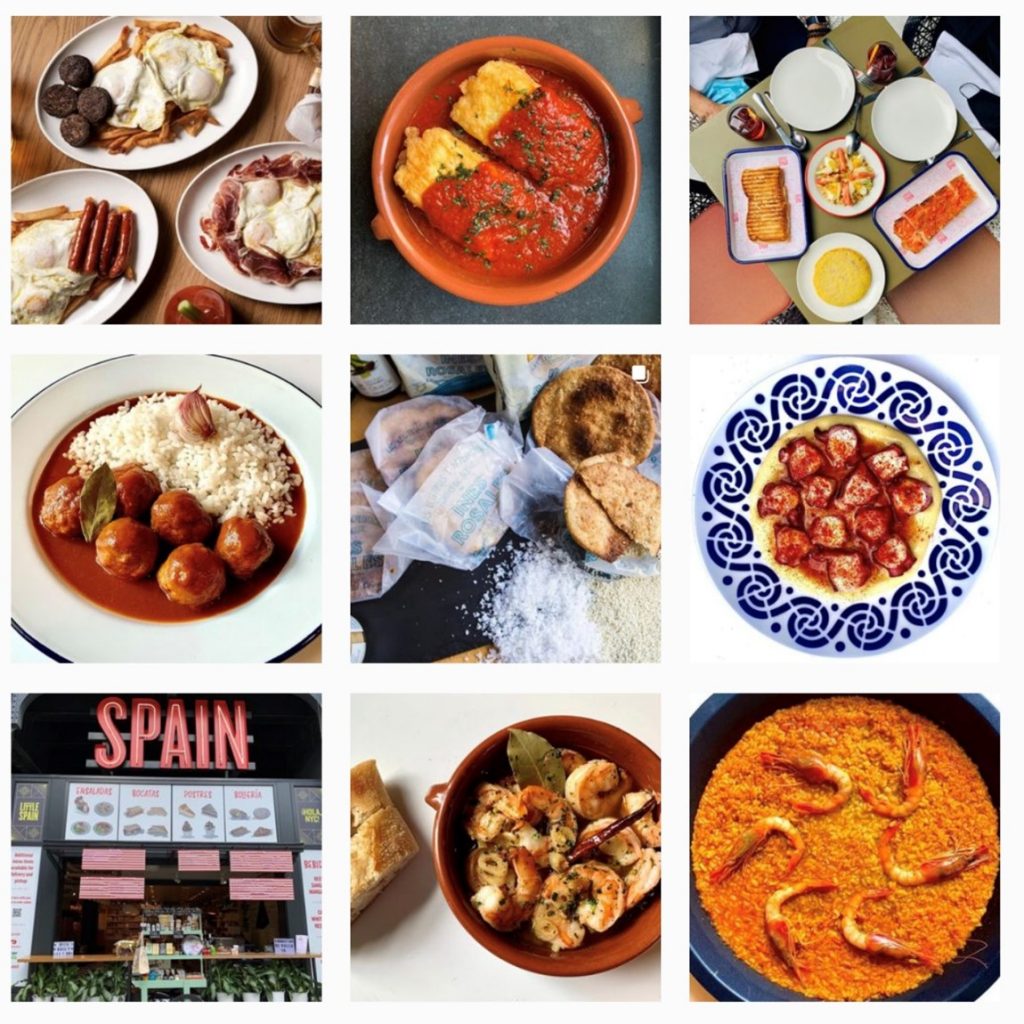
New York’s famous Mercado Little Spain (@littlespain) constantly changes up their food photography, alternating between closeups and making sure to utilize their unique plates to brighten up and accentuate their dishes.
Pro-tip: Be purposeful with your styling. Don’t use props or elements that take away the attention from your food. It also helps to switch on your camera’s grid to help guide you in composition.
Capture Your Food in All of Its Stages
While the final product will always be the star, your customers will also appreciate knowing how your food is prepared and the process that goes behind it. Take photos of your mise en place (without revealing too much!), show before and after shots, and capture the hands and faces that help make your dishes delicious. Behind-the-scenes moments can be just as mouthwatering.
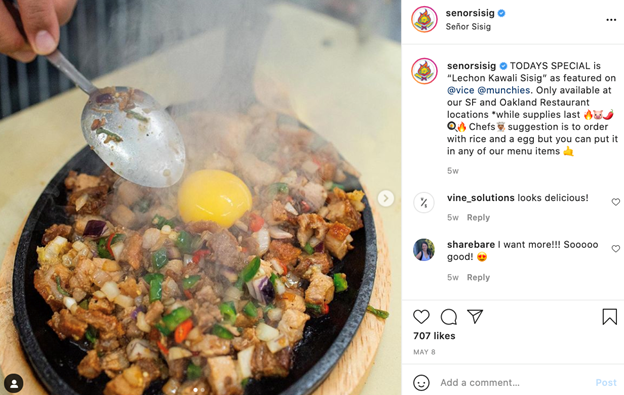
California-based Filipino street food giant Senor Sisig (@senorsisig) regularly posts shots of their food being prepped. The photo above, for example, is a simple shot of their best-selling sisig. But the capturing of the steam and the spoon just about to mix the yolk transports you to the moment right before you get your food. A shot like this will definitely convince your regulars to pay you a visit and for the curious to finally give your restaurant a try.
Go for the Extreme Close Up
Extreme close-ups work particularly well for “ugly delicious” or sloppy food. Capture the little details such as textures, dripping liquid, and small ingredients, and fill the entire frame with food. This way, people scrolling through social media can’t help but do a double-take.
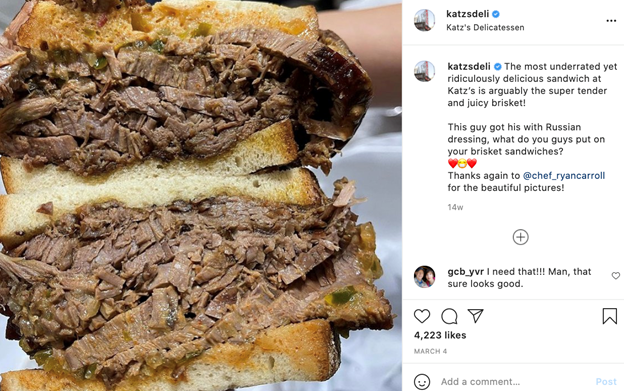
The iconic Katz’s Deli (@ketzsdeli) regularly posts extreme close-ups of their legendary pastrami sandwiches, almost covering the entire frame. It’s hard to not want to reach through the screen and try to take a big bite!
This photography style requires minimal edits as you’re relying on the visual impact of your food alone. It also minimizes your need to set up; all you really need is your dish and good lighting.
Keep Shooting
The only way to get better at taking photos for your Instagram page is to practice. Experiment with different settings on your camera, develop a personal style, and capture your dishes from different perspectives!
By practicing, you’ll also discover which angles work best for particular dishes and perhaps even learn some food styling. Of course, don’t keep these practice shots to yourself. Publish them on your Instagram page, your stories, and find out which photos work best for your followers. Once you get the hang of it, your photos will surely tempt more and more customers to place their orders.

